
FS-2022-0639 | November 2022
Developing Confidence in the Kitchen: How Adults and Older Siblings can Assist Youth (2 years and up) with Washing, Chopping, and Measuring
Introduction
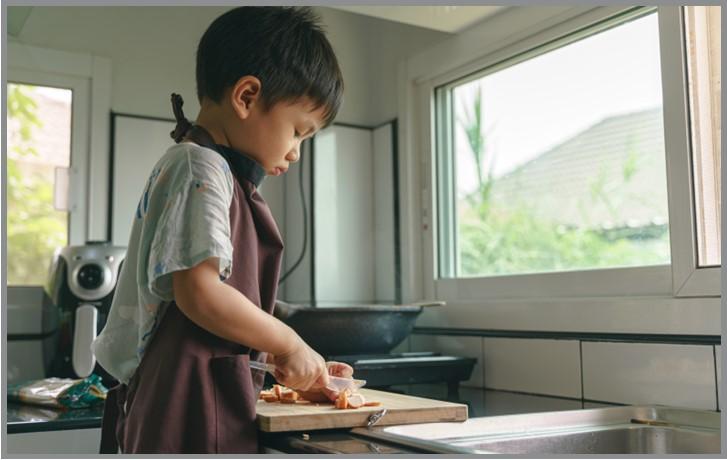
At an early age, youth become interested in preparing foods with an older sibling or an adult member of the family. Preparing and cooking meals with youth can be a fun way to spend time with your family. However, you may be hesitant when considering giving youth the opportunity to help, such as giving a youth a knife to learn how to cut foods. You may be unfamiliar with what activities can help youth improve their dexterity, confidence, and safe handling around nutritious foods. There are important safeguards to consider when youth help to prepare a meal. This publication highlights key aspects adults and/or older siblings can provide youth around three important kitchen activities:
- Washing produce (Section 1);
- Safely handling and chopping with knives (Section 2);
- and The basics of measuring dry and liquid ingredients (Section 3).
Reminding adults and older siblings of some of the kitchen basics will enable them to build confidence and excitement for our youth-the next generation of cooks!
Section 1: Importance of Washing Produce
Introduction
Washing or rinsing produce, such as fruits and vegetables, before eating is an important step to ensure the quality of the produce and the safety of your family. All produce should be washed, whether it’s organic, non-organic, home-grown, store-bought, or bought from the farmer’s market. Even youth younger than 2 years can begin to help wash/rinse produce.
In this section adults and older siblings will learn:
- Why washing produce is important to food preparation.
- When and how to wash produce with different surfaces.
- Why proper produce storage is essential.
Before Washing/rinsing
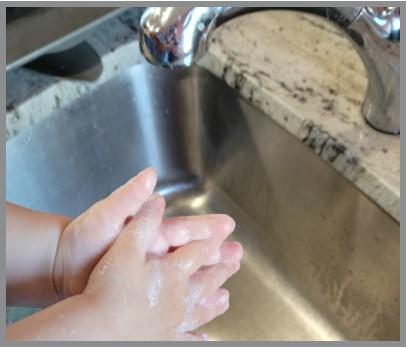
Before washing produce, it is important to have clean hands first to avoid “cross-contamination.” The United States Department of Agriculture defines cross-contamination as the transfer of harmful bacteria to foods or produce from other raw foods, cutting boards, cutlery, hands, or other surfaces. Washing hands with warm soapy water for 20 seconds can eliminate pathogens, such as bacteria and viruses on your hand (Figure 1.1).
When to Wash
Wash produce immediately before handling it for consumption. Wash produce immediately before eating it uncooked or raw. Wash produce immediately before cooking it.
Why Wash?
Washing produce before using or eating it removes any existing dirt or pathogens that might be on the outer surface. Produce can be contaminated during the growing process, by animals, by unsafe substances in the soil or water, or by unsafe handling techniques during transportation. Additionally, produce is handled by both grocery store staff and consumers. Washing the produce will reduce or eliminate contamination.
What to Wash
All fresh fruits and vegetables (produce) should be washed before eating or preparing. Wash only what you intend to eat or cook, and not the entire container or bag of produce. Washing an entire container or bag or produce, and then returning it to the refrigerator, can lead to spoilage as such as mold can grow on the damp surfaces.
How to Wash
Washing produce is quick and easy. The variety of surfaces found on fruits and vegetables makes the cleaning process slightly different for each, but even youth can help with this step.
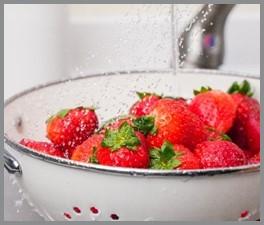
Before washing, wash your hands with warm soapy water to get the best clean (Figure 1.1).
- Do not wash produce with soap or other cleaning products. Cleaning products can be absorbed by fruits such as strawberries and can make people sick.
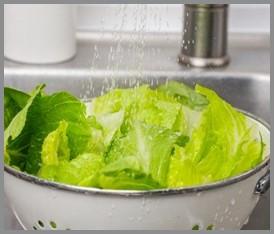
For leafy vegetables like lettuce, place them in a colander in the sink and rise with tap water (Figure 1.3).
Pat the lettuce leaves with a clean paper towel to absorb all of the moisture. Consider using a salad spinner to help dry the lettuce leaves more quickly. Removing the moisture helps salad dressing stick to the leaves.

Firm-smooth skin produce like apples should be washed well and scrubbed with a brush before being peeled to remove the waxy preservative. Not washing the outside of a peeled surface can still cause accidental cross contamination. If a pathogen existed on the unwashed surface and the produce was then peeled, the germs would be transferred into the flesh that is going to be eaten, resulting in cross contamination. Wash produce with a smooth surface as seen in Figure 1.4 with a produce brush, or rub with your hands.
For firm-rough skin produce such as melons and root vegetables, use a vegetable brush to remove dirt and preservatives as shown in Figure 1.5.
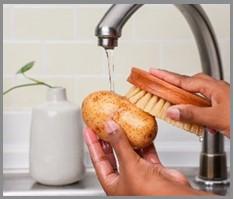
For mushrooms, use a damp paper towel and gently rub the top to remove any dirt.
After washing the produce, dry it with a clean cloth or paper towel.
Don’t Forget to Store It
The refrigerator temperature should be at or below 40 degrees Fahrenheit to allow for proper refrigeration and to prevent bacteria from growing.
Any washed or leftover produce should be stored in a container or sealable plastic bag in the refrigerator to preserve it and to maintain its quality and freshness.
Section 2: The Basics of Knife Safety
Introduction
Knowing when to give youth a knife to help chop may be terrifying, but youth can safely and successfully chop produce.
In this section, adults and older siblings will learn:
- Parts of a knife and types of knives.
- How to care for and use your knife safely.
- Youth-appropriate chopping activities.
Adult & Older Sibling Corner
Role model good behavior whenever you are holding a knife:
- Never point the knife at someone.
- Ensure that the knife point is facing down.
- Remember that a knife is a tool, not a toy.
- Wear closed-toe shoes in the kitchen.
- Roll up long sleeves so they don’t cause an accident while using a knife. Sleeves can be a distraction, can get in the way, or can get caught on other objects.
- Remove dangly jewelry and rings for the same reasons.
Questions to ask before allowing a youth to use a sharp knife
- Are they ready to use a knife (plastic or metal/ceramic)?
- Do you have an appropriate knife for their skill level?
- Do they need a stool to stand on to reach the kitchen counter?
- Do you have rules about knife safety when using, cleaning, and storing them?
Parts and Types of Knives
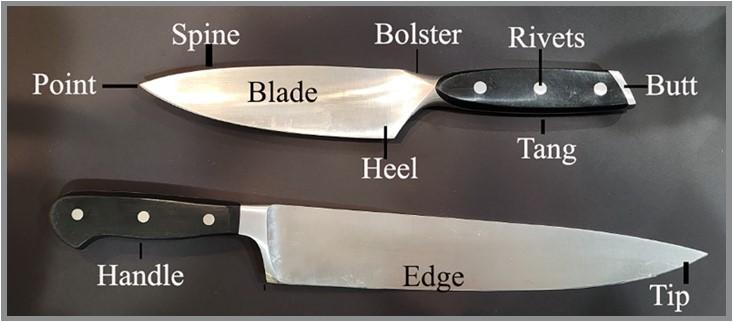
In general, most knives will resemble the key features and functions shown in this basic chef’s knife (Figure 2.1).

There are many types and style of knives. The following may be ones you have in your home, but youth may not be ready to use these knives safely (see “Youth Friendly Knives” below). See Figure 2.2.
Chef’s Knife-All-purpose knife for many types of cutting activities, including mincing herbs, chopping vegetables, and more. A blade can measure 6” to 12”, but ones measuring 8” or 10” are more comfortable for home cooks to use.
Paring Knife-Similar to a chef’s knife but much shorter, the paring knife allows for detailed cutting, trimming, peeling, and dicing.
Serrated Knife-Also called a “bread knife.” It has “teeth” from heel to point, and allows the user to slice foods that have a tough or waxy outside and soft inside, such as a crusty bread, a baguette, bagel, or a tomato.
Youth Friendly Knives
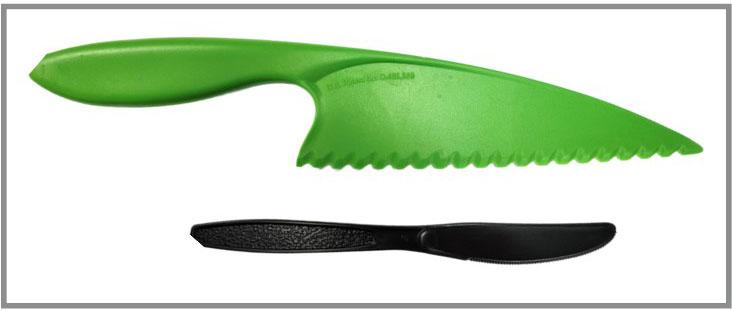
Figure 2.3 shows a pair of knives that are appropriate for beginning youth. A plastic picnic or lettuce knife are a great start to help youth gain dexterity and finger strength, as they build skill to using knives with a metal or ceramic edge.
Care for Your Knives
Proper care of your knives will ensure their longevity. Make sure safety measures are in place to avoid knife related accidents.
- Learn how to sharpen your knives to maintain knife quality and safety.
- Store knives that are not in use in a knife guard, woodblock, or drawer for safety.
- Wash knives by hand with dish soap and hot water to maintain knife quality.
- Don’t leave knives out of sight in a soapy sink/bowl where they may be mishandled.
- Don’t put chopping knives in the dishwasher to maintain knife quality.
How to Hold a Knife

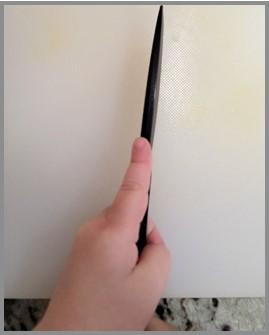
As with all tools, there is a right way and a wrong way to hold a knife.
Holding a knife correctly prevents the knife from slipping and accidentally cutting something other than food.
Key Things to Tell Youth
- Use your dominant hand (the hand you use for writing). See Figure 2.4. Incorrect methods. See figure 2.5.
- Hold the knife handle with a moderately firm grip, like you are shaking someone’s hand, with your thumb wrapped in the handshake or in this case handle.
- Ensure that the top of the hand is facing upward.
Guiding Youth in Learning How to Chop
Tell youth to:
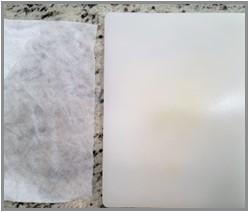
- Place a damp paper towel or towel on the kitchen counter with a flat surface (not close to the counter edge). See Figure 2.6.
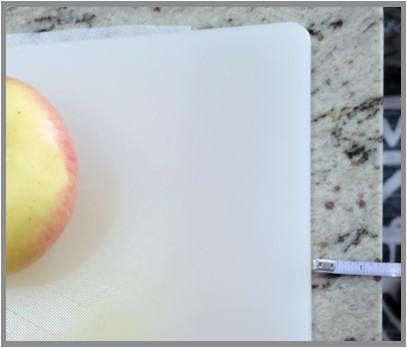
- Place a clean cutting board atop the towel. The towel will keep the cutting board from sliding. Make sure the cutting board is about 1” to 1.5” away from the edge of the counter.
- Start with cutting soft fruits and vegetables with an appropriate knife. For beginners, we recommend a plastic knife (see figure 2.3).
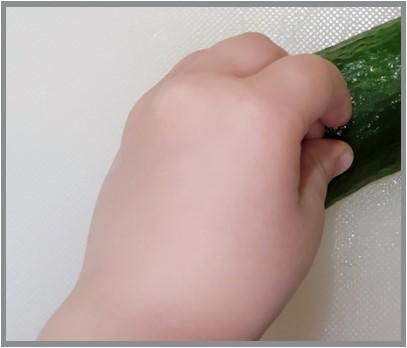
- Have the youth make a “C” with their non-dominant hand holding the produce, so the fingers are cupped and tucked against the palm as shown in Figure 2.8. This reduces their chances of being cut.
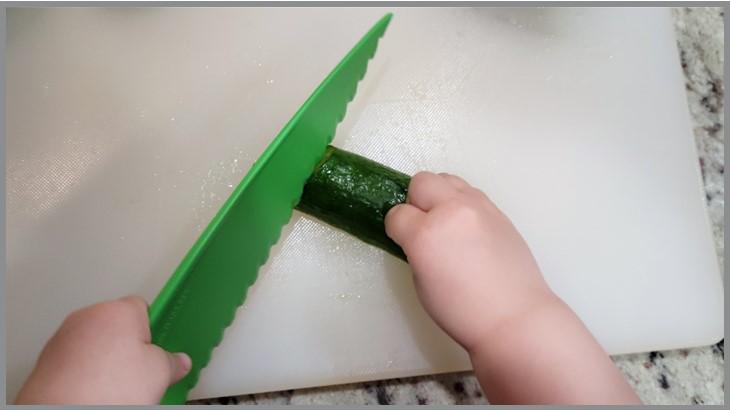
- Use a rocking motion when cutting, to ensure that the tip and point of the knife isn’t moving left to right, only up and down. Use the hand securing the produce to slide the produce towards the knife that is rocking up and down on the cutting board.
Chopping Activities for Youth
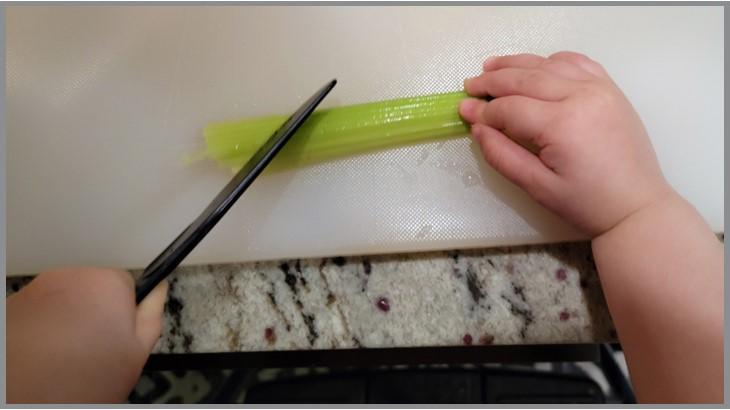
Let’s practice chopping different shaped produce!
What You’ll Need:
- Appropriate sized knife for the youth’s skill level. Note, sometimes a larger lettuce knife (Figure 2.3) can provide youth with more chopping leverage.
- Cutting board.
- Damp paper towel or hand towel.
- Step stool.
- Foods of varying size and shape that are soft and easy to cut with a plastic knife:
- Circular: Cherry tomato or grape
- Long: Celery
- Round: Cucumbers or banana
- Wash your hands with warm soapy water as shown in Figure 1.1. Scrub/lather for 20 seconds, rinse, and dry them with a paper towel or clean hand towel.
- Gather washed produce (Section 1).
- Select an appropriate knife, cutting board, damp paper towel or hand towel. Place a damp paper towel/hand towel underneath the cutting board.
- Place a step stool for youth in front of the cutting station (if needed).
- With circular produce such as cherry tomatoes, have an adult or older sibling slice the circular fruit in half, so that youth can more easily chop each half, flat side down. Have youth hold the knife with their dominant hand and place a tomato half on the cutting board flat side down. With their non-dominant hand, use their fingers curled in with the “C” method described above to keep the tomato half steady while they cut. You may want to guide youth’s left and right hand so they learn the motion.
- With long produce such as celery shown in Figure 2.10, place it on the cutting board so the rounded stalk faces upwards and stalk does not rock. Cut off the stem and the root end. Have youth use their non-dominant hand to push the celery towards the rocking up and down motion of the knife with their fingers curled in.
- Alternatively, use the knife to cut the celery lengthwise, as long or short as youth want.
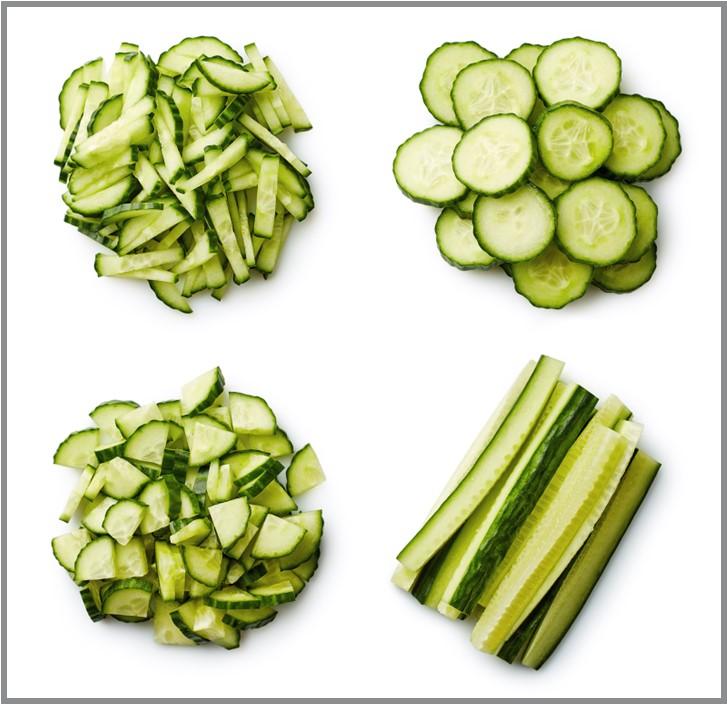
Practice youth’s basic knife skills with other produce, such as cucumbers, bananas, and other fruits and vegetables your family enjoys.
Ask youth to try cutting new shapes as they get comfortable with chopping.
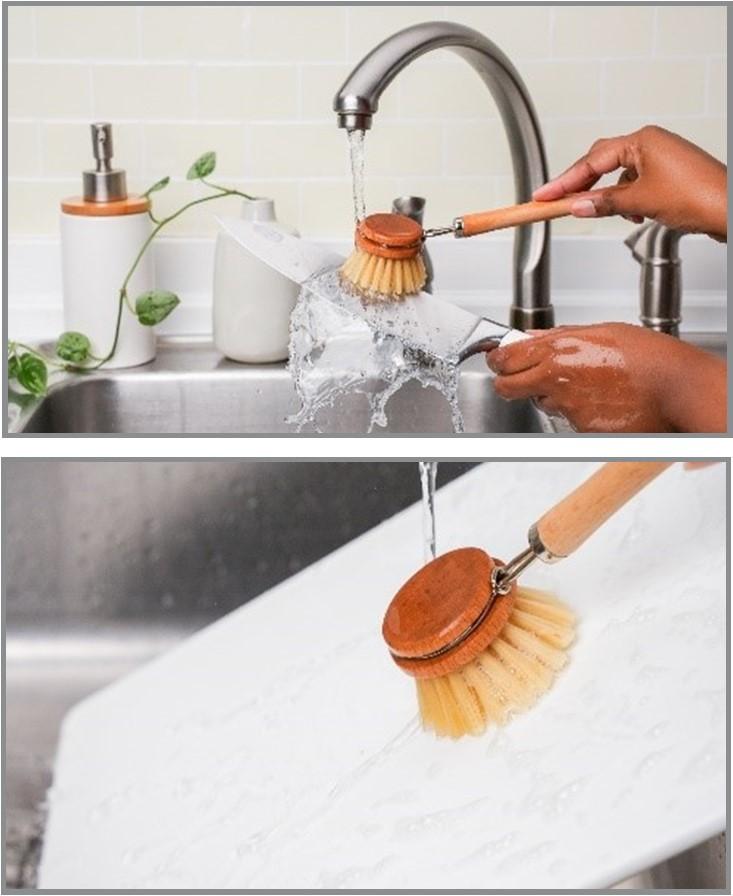
Finally, youth and adults can work together to wash the knife and the cutting board with hot soapy water and a scrub brush as shown in Figure 2.12. Set the knife and cutting board on a drying rack, or hand dry them with a clean towel used only for drying and safely store the knife.
Recipes
Try all your household’s fresh cut produce in some of our favorite snacks and meals:
https://extension.umd.edu/programs/family-consumer-sciences/snap-ed/eat-smart/recipes
Section 3: The Basics of Measuring Dry and Liquid Ingredients
Introduction
Measuring dry and liquid ingredients are an important aspect of cooking and baking. Being able to accurately measure a dry or liquid ingredient takes practice and it can make or break a recipe.
In this section, adults and older siblings will guide youth in learning how to measure:
- Dry ingredients.
- Liquid ingredients.
- Weigh ingredients on a scale.
What You’ll Need
- Measuring cups (dry).
- Measuring spoons.
- Clear liquid measuring cup (for wet ingredients).
- Measuring scale (if available).
- Tap water.
- White granulated sugar or cornstarch. Flour has been a source of foodborne illness, and is not recommended for practicing purposes.
How to Measure Dry Ingredients
Practice with white granulated sugar or cornstarch for best food safety measures.
- Gather measuring cups, measuring spoons, scale if available, and dry ingredients.
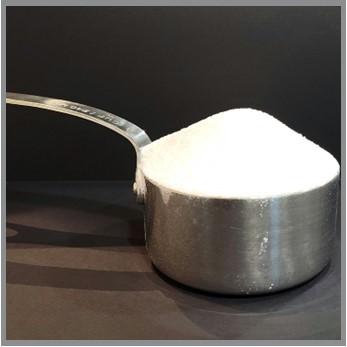
- Place a 1-cup measuring cup on a flat surface like the kitchen counter to get the most accurate measurement as shown in Figure 3.1.
- Use the 1-cup measuring cup and scoop the white granulated sugar so that it overfills the cup.
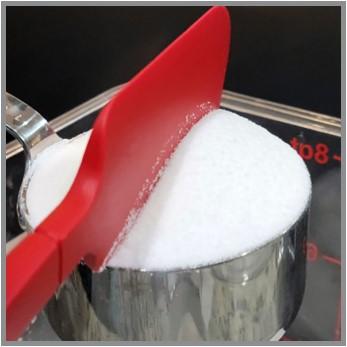
- Hold the measuring cup over a plate, bag, or bowl. Use something with a flat straight-edge, like the spine of a knife or spatula, and run the flat side over the top of the measuring cup, pushing as much of the excess back into the container, as shown in Figure 3.3. This creates exactly 1 cup of sugar/cornstarch for the recipe.
How to Measure Wet Ingredients
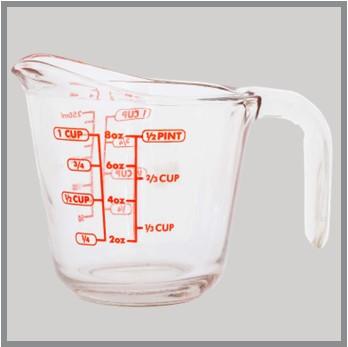
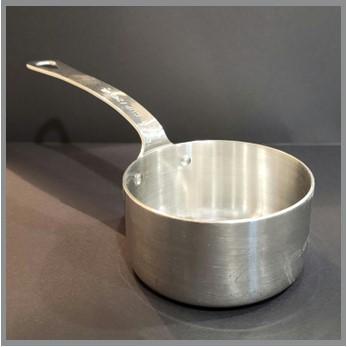
- Gather liquid measuring cups and scale if available, and wet ingredients (water). A typical liquid measuring cup is shown in Figure 3.4.
- Place the clear measuring cup on a flat surface like the kitchen counter to get the most accurate measurement.
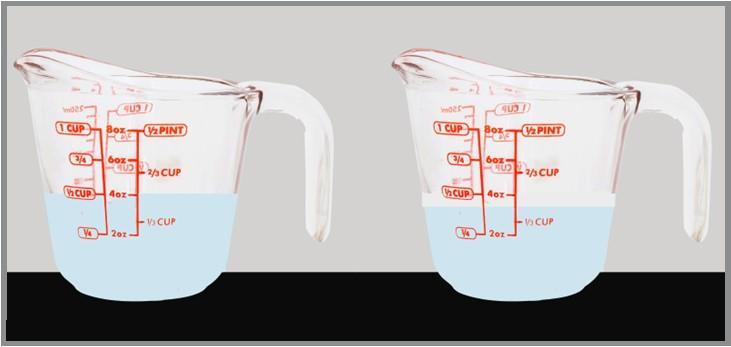
- Pour water into the measuring cup to the ½-cup line.
- To accurately read the measurement, make sure your eyes are level with the measuring cup to clearly see the meniscus line. The meniscus line is the bottom of the liquid’s curve when you are looking at the liquid cup measure at eye level.

How to Weigh Dry and Liquid Ingredients
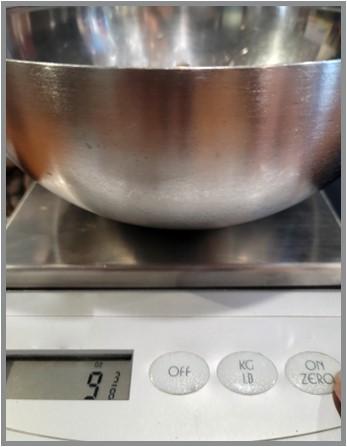
Adults and older siblings can help youth find conversion tools available online to convert ounces to grams and vice versa, depending on where a recipe is found.
- Gather scale, mixing bowl, and dry or wet ingredients.
- Place the mixing bowl on top of the scale and then hit the “zero” or “tare” button as shown in Figure 3.8 so the weight of the bowl isn’t included.
- Add the needed amount of white granulated sugar to the mixing bowl, use a spoon to control the amount added until the ounces (oz) or grams (g) are measured as the recipe calls for.
- If a recipe calls for other ingredients, empty the sugar in a new bowl and re-zero/re-tare the bowl, and add the next ingredient as needed.
Conversions Cheat Sheet
| Teaspoons (tsp) | Tablespoons (tbs) | Cup |
|---|---|---|
| 3 teaspoons | 1 tablespoon | 1/16 cup |
| 6 teaspoons | 2 tablespoons | 1/8 cup |
| 12 teaspoons | 4 tablespoons | 1/4 cup |
| 24 teaspoons | 8 tablespoons | 1/2 cup |
| 36 teaspoons | 12 tablespoons | 3/4 cup |
| 48 teaspoons | 16 tablespoons | 1 cup |
| Cups | Fluid ounces (fl. oz) |
|---|---|
| 1 cup | 8 fl. oz |
| 2 cups | 16 fl. oz |
| 4 cups | 32 fl. oz |
| 16 cups | 128 fl. oz |
Conclusion
We hope that this document provided a refresher about the importance of washing produce, basic knife skills, and measurement techniques, along with some new tips and tricks to assist with your household’s next meal preparation - that will include your youngest chef. Enjoy!
References
- Food and Drug Administration. (Mar. 2021). FOOD FACTS: Raw Produce: Selecting and Serving it Safely. https://www.fda.gov/media/77178/download
- Mushroom Council (Feb. 25, 2020). Sourcing, Selecting, Cleaning, and Storing Mushrooms for School Meals. https://www.mushroomcouncil.org
- Rombauer, I.S., Rombauer Becker, M., & Becker, E. (2006). Joy of Cooking. Scribner.
- The Partnership for Food Safety Education. (2020). Safe Recipe Style Guide Food Safety Stock Library. https://www.saferecipeguide.org/safe-recipe-style-guide-library/
- University of Maryland Extension, SNAP-Ed. (2020). Recipes for Your Family. https://extension.umd.edu/programs/family-consumer-sciences/snap-ed/eat-smart/recipes
SAMANTHA BENNER
SHAUNA C. HENLEY, PH.D.
shenley@umd.edu
This publication, Developing Confidence in the Kitchen: How Adults and Older Siblings can Assist Youth (2 years and up) with Washing, Chopping, and Measuring (FS-2022-0639) is a part of a collection produced by the University of Maryland Extension within the College of Agriculture and Natural Resources.
The information presented has met UME peer-review standards, including internal and external technical review. For help accessing this or any UME publication contact: itaccessibility@umd.edu
For more information on this and other topics, visit the University of Maryland Extension website at extension.umd.edu
University programs, activities, and facilities are available to all without regard to race, color, sex, gender identity or expression, sexual orientation, marital status, age, national origin, political affiliation, physical or mental disability, religion, protected veteran status, genetic information, personal appearance, or any other legally protected class.