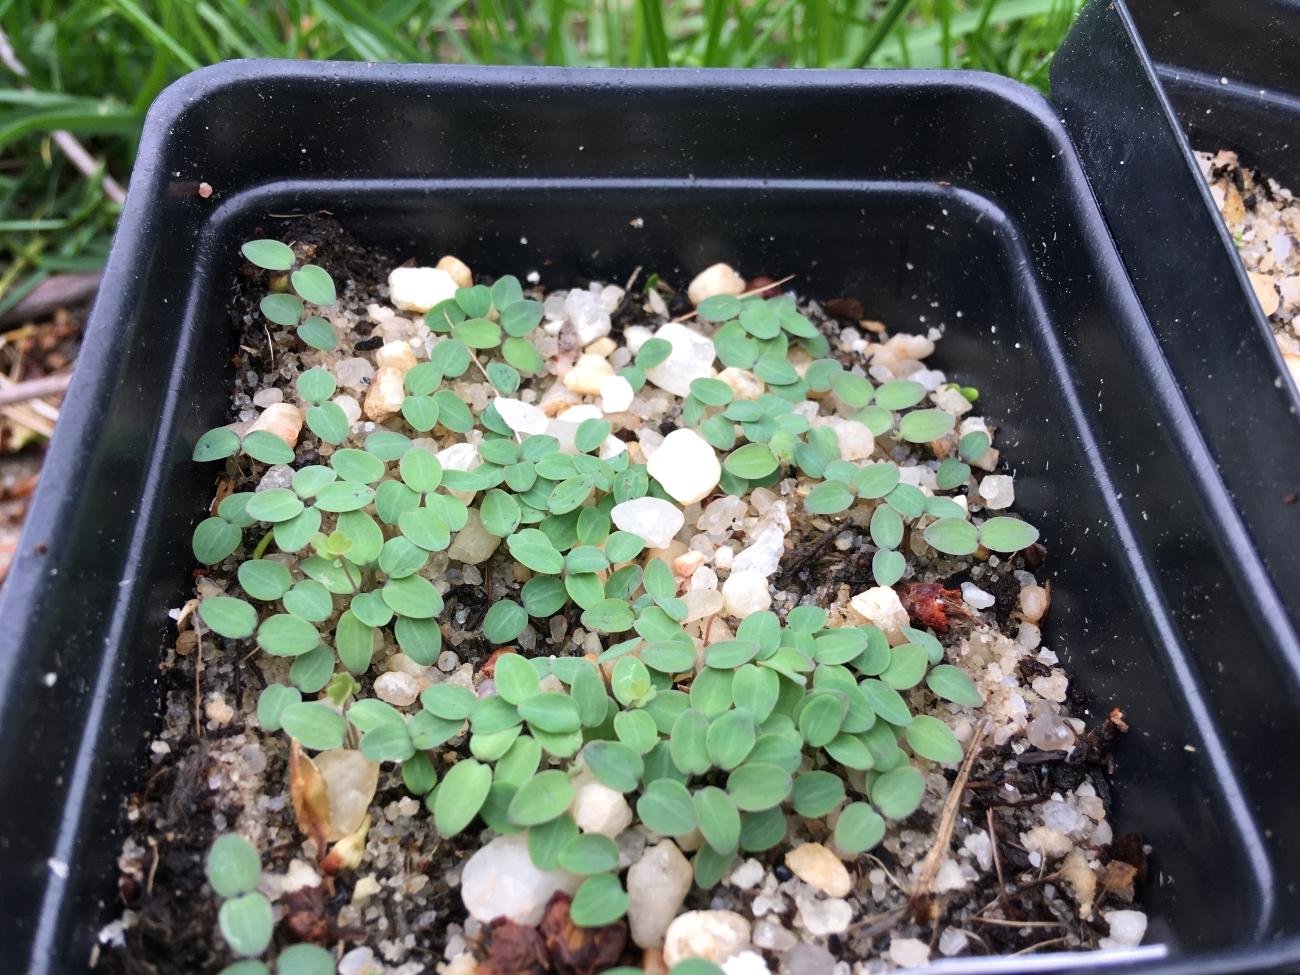
Wild columbine (Aquilegia canadensis) seedlings. Photo: M. Boley, UME
Key points
- Collecting seed from native plants is beneficial for preserving local genetics (called “ecotypes”) and for sourcing species difficult to find commercially.
- Successful seed collection and germination depend on many factors. Seed ripening depends on how long it takes seed heads to mature and dry once blooms fade. Ripe seeds often require cold, moist storage, warm storage, or other treatments before they will germinate. Due to adaptations to variable climate and environmental conditions, seeds might not germinate uniformly.
- To gain experience, select native plant species that will germinate easily and grow in the landscape conditions available without having to make alterations.
Collecting native seed
Considerations before seed collecting
Collecting seed from native plants is a rewarding, cost-reducing, and environmentally-friendly practice. Before collecting seed, consider:
- What species you would like to grow, and whether they are appropriate for the project or location.
- Proper identification of the plant being collected. If you are unsure, you can consult your local Extension professional or use Ask Extension. Plant guides and books are also great resources.
- Collection and sowing techniques and timing are different for each plant and will depend on the genus.
- You must have permission from the property owner or entity. Do not collect seed from public, state, or federal park locations.
- Roadsides are an option, but use caution around traffic and try to find locations that are not busy. Do not collect from main highways or interstates for safety reasons.
- Look for seed-collecting events held by local Master Gardener programs or other non-profit organizations; check your local library programs for seed swaps and seed libraries.
- It is illegal to collect seed from any plants that are considered rare, threatened, or endangered species in Maryland without a permit.
- Locate larger populations or groups for collection; these plants have better genetic diversity and contribute to better survivability.
- It is ethical to collect from a larger source to preserve the plant community at the site. Harvest no more than 5-10% of a wild population.
Principles of seed collecting
- Learn whether the plant is an annual, biennial, or perennial.
- Annual: Bears seeds the same year they are planted. Typically does not overwinter, but may self-seed. Example: Orange jewelweed (Impatiens capensis)
- Biennial: Grows foliage the first year, then flowers and goes to seed in the second year. Example: Common primrose (Oenothera biennis)
- Perennial: Regrows every year from an established root system. May grow more slowly in the first 1-2 years, and may not flower in the first year. Once mature, can produce seed every year. Example: New York ironweed (Vernonia noveboracensis)
- Mark flowering plants intended for seed collection with flags to identify the location you plan to collect from. Flags can be marked with the anticipated ripening date.
- Give seeds enough time to ripen fully. Seed heads are generally dry enough for harvest 6-8 weeks after the bloom period has finished. Individual plants will not necessarily mature at the same pace and should be periodically checked.
- Seed heads should be completely dry to avoid mold in storage. Do not harvest during or immediately after a rainfall, and avoid harvesting in the morning after a heavy dew.
- Gather collection and storage materials; recommendations include:
- Sharp pruners, loppers, or scissors
- Garden gloves
- Paper bags, pillowcases, a wide bucket, or other clean receptacle
- Labels or a marker
Native plant species easy to collect
Start with native plant species that are easy to collect, clean, and grow.
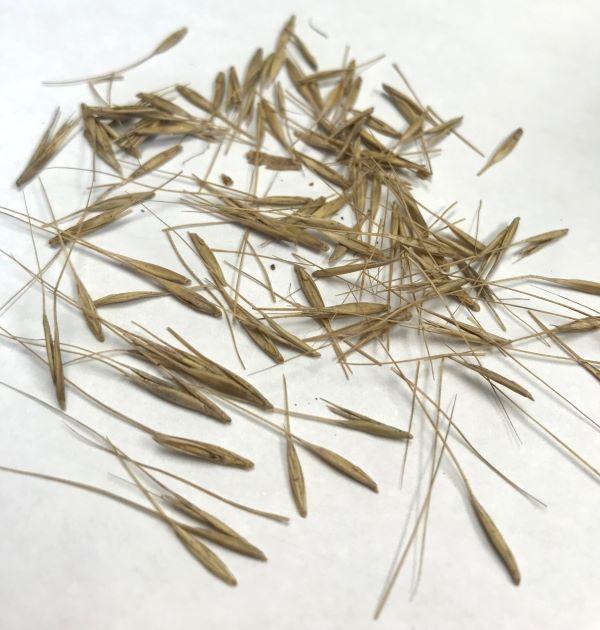
- Grasses: Most native grasses are easy to grow from seed, and need minimal cleaning for storage. However, identification can be difficult; a positive I.D. should be made prior to harvest. Examples: Bottlebrush grass (Elymus hystrix), switchgrass (Panicum virgatum), purple lovegrass (Eragrostis spectabilis), Northern sea oats (Chasmanthium latifolium)
- Flowering perennials: Many perennials will require stratification (breaking seed dormancy to promote germination) before sowing; this information is covered in Winter Native Seed Sowing. These species self-sow readily in the wild and are easily adapted to sowing in pots or containers. Examples: Black-eyed Susan (Rudbeckia hirta), cutleaf coneflower (Rudbeckia laciniata) wild columbine (Aquilegia canadensis), lyre-leaf sage (Salvia lyrata), white wood aster (Eurybia divaricata), golden groundsel (Packera aurea), blue vervain (Verbena hastata)
Collecting the seed
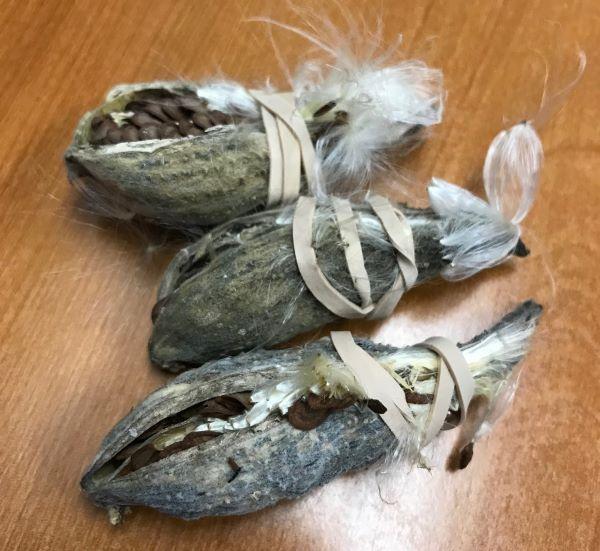
- Cut dried seed heads and place them face-down (cut ends upward) into paper bags marked with date (MM/YYYY), location, common name, scientific name, and any interesting features or details (optional).
- You can also “strip” seed heads, such as native grasses, by using a fine-tooth comb or garden gloves to protect your hands. Clean tools between harvesting different species.
- In place of a paper bag, you can also use clean buckets, envelopes, or pillowcases for harvesting.
- Watch video: Collecting Seeds.
- Seeds and seed heads should be dried in paper or another breathable container for an additional 2-4 weeks following collection. They should be kept in a location with low humidity during this time. Do not store seeds in plastic or glass until seeds are completely dried and cleaned, or the stagnant conditions may support mold.
Certain species produce seeds that are hydrophilic; these seeds need moist storage in order to germinate later. This is a prime example of why it is important to understand the native plant species. Hydrophilic seeds are not recommended for beginners.
Many native trees and shrubs have “fleshy” seeds protected by a berry, drupe, or other fruit. These seeds require different processing than dry seeds, to remove the fruit flesh through fermentation, physical cleaning, or other elaborate means. Examples of species with fleshy seeds include: viburnums, blueberries, pawpaw, and persimmons. For detailed information regarding the cleaning of fleshy seeds, you can consult the USDA Nursery Manual for Native Plants, the recommended resources below, or contact your local Extension agent.
Preparing and cleaning seed
After seeds are properly dried in their original collection container, they can be cleaned for long-term storage.
- Work areas should be lined with newspaper, which can be replaced in-between working with different species to prevent cross-contamination. Work with a single species of seed at a time.
- Seeds may have already fallen into the bottom of the bag or container, and these can be sieved or screened to remove leaves, stems, and chaff (husks and inert debris from seed heads). You may have to perform several rounds of cleaning.
- To loosen seeds from the seed head, crush or beat the bags with a rolling pin. You can also thresh seed heads in a cotton bag or pillowcase. Threshing refers to the action of separating the seed from the seed head using machinery or other physical means.
- Winnowing is the process of using a current of air to remove chaff from seeds. Winnowing can be doneon windy days or in front of a fan. This is not recommended for very small, dust-like seeds (such as Penstemon or Lobelia). [Watch video: Winnowing and Sieving]
Storing collected native seed
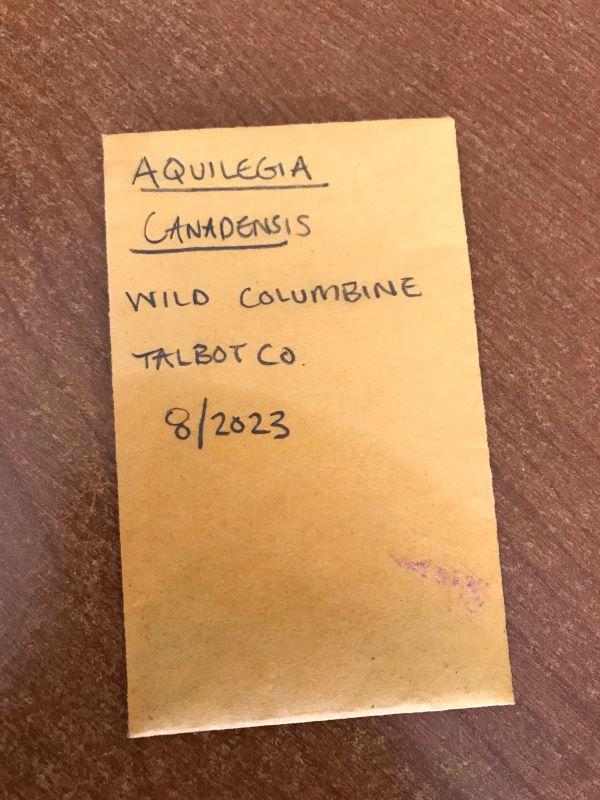
- Label your envelopes, paper bags, or storage containers with the common and scientific name, location collected, and the month/year of collections (MM/YYYY). Each time you transfer seed to new containers, this information must be on the label.
- Store in a cool, dry location away from insect pests or animals (such as mice or other rodents). Seed can also be kept in the fridge for long-term preservation.
Native seed sources and understanding ecotypes
A single native plant species often grows wild across a wide region, where local conditions of soil type, climate, elevation, daylength, pest and disease pressures, and other environmental conditions will vary. Over time, as populations in each of those unique areas fine-tune adaptations to those conditions, their genetics can differ. Populations within a species that become distinct from each other are called ecotypes.
If you are unable to source seeds on your own, there are many reputable companies that sell native seed mixes or individual species. When purchasing native seed, it is important to understand the value of ecotypes. By sourcing seeds that come from a population as close to your region as possible, they are more adapted to local conditions and will be less likely to adversely affect the gene pool of local wild plants when they cross-pollinate. However, finding local ecotypes is difficult due to the lack of availability, which results from habitat loss and cross-breeding with non-local sources of the same species.
For sourcing native seeds or plants, the Maryland Native Plant Society maintains a list of nurseries and vendors that cater specifically to native species. The Xerces Society also has a searchable Native Plant, Seed, and Services Directory.
More examples of native plant and seed sources
- Roundstone Native Seed Company- located in Kentucky; does not have MD ecotypes, but sells seed and mixes that are suitable for MD
- Prairie Moon Nursery- located in Minnesota; does not have MD ecotypes, but sells seed and mixes that are suitable for MD
- Ernst Conservation Seed- sells MD, PA, DE, and VA ecotype seed
- Chesapeake Natives- local ecotype native plants; does not sell seed
- Environmental Concern- local ecotype wetland plants; does not sell seed; wholesale only
- Herring Run Nursery- Blue Water Baltimore affiliate; plants, no seed sales; wholesale option
- Chesapeake Valley Seed- seed distributor with some local ecotype seeds; seed mixes and custom blends (on request)
- Maryland DNR John S. Ayton Tree Nursery- bare-root woody tree/shrub whips (unbranched saplings); shipped in spring; bulk sales only - minimum order must be met
Be sure to check your local library or Master Gardener Program to see if they conduct a seed swap, seed share, or host a seed library. While these seeds are shared at your own risk, the popularity of heirloom and native seed varieties is increasing. You can locate seed libraries on the Seed Library Network map.
Winter sowing with native seeds
Key points
- Know your location and growing conditions, and select species appropriate for the site conditions.
- Research germination requirements before sowing; they can vary from one species to another. Many species require pre-treatment to break dormancy and initiate germination.
- Be patient. Native seeds are different from conventional garden flowers and vegetables that have been selectively bred. They will not germinate uniformly or consistently.
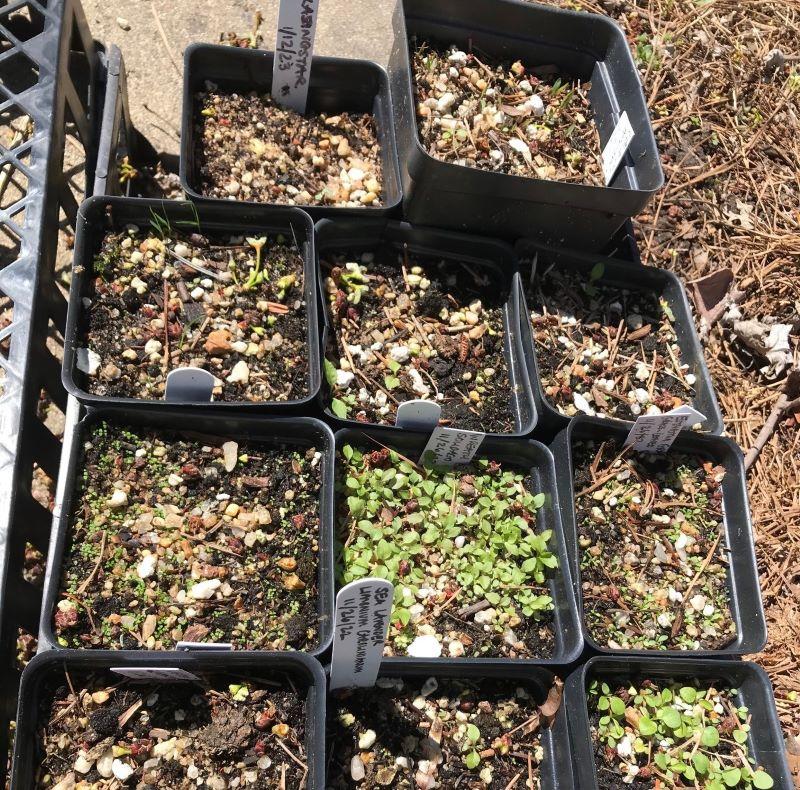
What is winter sowing?
- Winter sowing allows gardeners to use natural weather conditions in order to break seed dormancy (stratification). Additionally, some seeds may require physically altering the seed coat (scarification) to allow quicker water absorption to improve germination.
- The best time to sow seeds for winter stratification is late November through January.
- Many gardeners use recycled milk jugs or other enclosed plastic containers to winter sow their seed. This method is easy, inexpensive, and often successful. [Watch video: Winter Sowing Basics]. However, there is an increased risk of excessive moisture, leading to mold growth. It also creates an artificial environment that shields the seedlings from the natural weather and elements, like rain and snow for moisture. Winter sowing is simple, inexpensive, and can be done using the following materials:
- Clean 3- to 4-inch diameter pots
- Seed starting mix (not potting mix)
- Plastic labels (wooden labels fade) and a pencil (marker will fade)
- Coarse/all-purpose sand (Play sand or fine sand is not recommended since it can develop a hardened crust that makes it difficult for seedlings to break through.)
- Trays: webbed or mesh style (optional) plus solid trays
- Clean containers for mixing (small cups, clean yogurt containers, etc.)
- Slow-release fertilizer (optional)
- Compost (optional)
Seed sowing procedure
- If the seeds require treatment, soak or scarify them prior to sowing. Example: some Baptisia seeds require soaking in warm water for up to 24 hours.
- Work with one species at a time to avoid cross-contamination of seeds and to keep a cleaner workspace.
- Pre-moisten your seed starting mix. Optional: mix 25-30% compost in with your seed starting mix. Your media should be moist, but not soaking wet. Potting mix is not recommended as a substitute since the material is coarser and has larger particles; smaller seeds will get buried too deeply. It can also vary more in quality and may contain undesirable ingredients.
- Fill your 3- or 4-inch pots with the mixed media and gently tamp down, leaving generous space to the lip of the pot.
- Optional: if using fertilizer, apply the appropriate amount to the pot. A slow-release fertilizer appropriate for perennials is fine. Do not use fertilizer if compost is already mixed into your media.
- Fill the remaining space with potting media to within a half-inch to one inch of the top of the container.
- In a separate, smaller container, mix seed thoroughly with sand. Use a general ratio of 1 teaspoon of seed to 3 teaspoons of sand for mixing. For very small or dust-like seed, use less than 1 teaspoon of sand.
- Lightly spread your seed and sand mixture evenly across the top of the pots full of growing media.
- Write on your plastic label with a pencil, including the following information: common name, scientific name, date sown (MM/YYYY), and location the seed was sourced (example: Talbot County, MD). Each pot should have a label.
- Fill the solid-bottom tray or container with approximately 1 inch of water. Set pots into water to soak growing media. Do not water pots from the top down; this displaces seeds and can potentially wash them out of the pots completely.
- Remove pots after 10 to 15 minutes of soaking and relocate to a webbed or mesh tray that allows for drainage. If you do not have a webbed tray, pots can be carried individually to a secure location.
- Place your pots/webbed trays in an area that is:
- Exposed to light
- Protected from heavy wind or damage
- Supported (to avoid pots from being tipped or knocked over)
- Protected from disturbance, such as animals foraging for seed. This can be achieved by placing a mesh or upside-down webbed tray on top weighted with rocks or bricks.
- Watch Video: Winter Native Seed Sowing in 90 Seconds.
Germination and transplanting seedlings
- The most difficult part of winter sowing is waiting for the seedlings to germinate! Most flowering perennials can germinate after 60-90 days of winter (cold, moist stratification). They should not require any watering or attention during this time.
- Some species can germinate as early as March, and others require warmer temperatures. For example, most warm-season native grasses require consistent temperatures above 70℉ for germination.
- Once seedlings start to develop true leaves and reach a height of 1 to 2 inches tall, they can be carefully transplanted to individual pots or plug trays. An individual 4-inch pot can produce MANY seedlings, so it may be more economical to transplant into plug trays. 28 or 50 DEEP cell propagation trays will be suitable for most species. Plug trays can be reused, but should be washed and sanitized between uses.
Butterflyweed seedlings ready to transplant. Photo: M. Boley, UME - Transplants in plug trays can use standard potting media (rather than seed starting mix) with slow-release fertilizer.
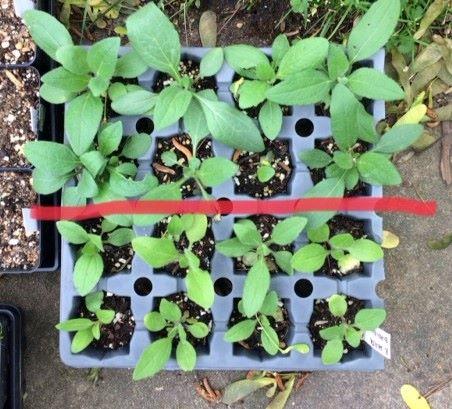
Black-Eyed Susan (Rudbeckia hirta) seedlings; grown with a slow-release fertilizer provided (above red line) compared to seedlings grown without a fertilizer (below red line). Photo: M. Boley, UME - Once transplants reach an adequate size with well-developed root systems, they can be transplanted into a larger single-quart container or directly into the ground. Seedlings that are too weak or small to transplant can be left in pots or trays until they have further developed.
Northern sea oats (Chasmanthium latifolium) seeds germinate very easily and are great for beginners. Photo: M. Boley, UME 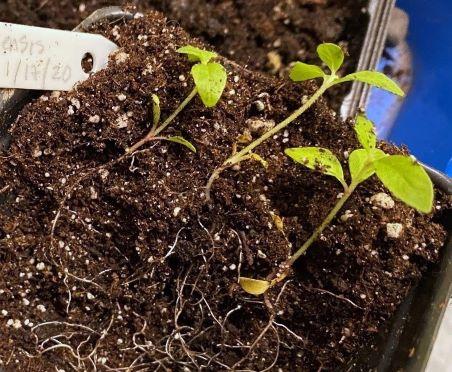
Ironweed seedling roots. Photo: Janet Mackey
Suggested native species for winter sowing
Key: CMS = Cold Moist Stratification. This means the seeds require moisture and temperatures at 40 degrees (or winter-like temperatures). A refrigerator is a good substitute for stratification, but not a freezer.
| Suggested Native Species for Winter Sowing | |||
|---|---|---|---|
| Scientific Name | Common Name | Stratification | Notes |
| Kosteletzkya virginica | Seashore mallow | Not needed (but doesn’t hurt) | Seeds need warm (72℉), moist soil to germinate. Larger seeds and seedlings make handling easier. |
| Vernonia noveboracensis | New York ironweed | 60-90 days, CMS | Fast-growing and may flower from seed the first year. |
| Rudbeckia hirta | Black-Eyed Susan | 60-90 days, CMS | Great germination rates - germinates early and quickly in spring. |
| Grasses: many species | various | Cold stratification is not required but can improve germination rates. | Most native grasses require air temps above 70℉ for germination. |
| Salvia lyrata | Lyre-leaf sage | 60-90 days, CMS | Seeds are prolific, with excellent germination rates. Seedlings will be very low to the soil. |
| Eurybia divaricata | White wood aster | 60-90 days, CMS | Excellent germination rates. |
| Packera aurea | Golden groundsel | 60-90 days, CMS | Excellent germination rates; fluffy pappus attached to seed is difficult to remove. |
| Aquilegia canadensis | Wild columbine | 60-90 days, CMS | Easy to germinate, but difficult to pot up. Seedlings are small and difficult to handle. |
| Lobelia cardinalis | Cardinal flower | Not needed (but doesn’t hurt) | Very small seeds, very small seedlings. Difficult to handle. |
| Verbena hastata | Blue vervain | 60-90 days, CMS | Good germination rates. |
NOTE: If you miss the timing for winter sowing, some native plant genera that do not need cold stratification include Andropogon Agastache, Helenium, Helianthus, Heliopsis, Houstonia, Lobelia, Oenothera, Panicum, and Rudbeckia. Most native grass species do not require stratification.
Additional resources
Species-specific information
Suppliers of native plant seeds often provide pretreatment requirements and other germination tips. Examples of such resources include:
- Prairie Moon Nursery | Minnesota-based mail-order supplier of native seeds and plants.
- Ernst Conservation Seeds | Pennsylvania-based mail-order supplier of bulk native seeds and seed mixes for restoration projects.
- Roundstone Native Seed Company | Kentucky-based mail-order supplier of native seed and seed mixes.
Informational websites
- Ecological Landscape Alliance: Growing in the Off-Season – Native Perennials from Seed
- Wild Ones, an educational non-profit promoting native landscapes
Winter sowing videos/podcast
- UC Davis Arboretum & Public Garden, “Planting Native Wildflower Seeds”
- Oneida County Land & Water Conservation, “Winter Sowing Native Plants”
- The Joe Gardener Show Podcast, Episode #130, “Winter Sowing: A Simple Way to Successfully Start Seeds Outdoors”
- All Things Plants Podcast, Episode #104- “The Joy of Winter Sowing” (or find through your preferred podcast streaming service)
Books
- Native Trees, Shrubs, & Vines, by William Cullina
- Native Ferns, Moss, & Grasses, by William Cullina
- Wildflowers: A Guide to Growing and Propagating Native Flowers of North America, by William Cullina
- U.S.D.A. Forest Service, Agriculture Handbook - Nursery Manual for Native Plants: A Guide for Tribal Nurseries
- Indigenous Landscapes LLC., A Native Plant Propagation Guide & Nursery Model (cost: $23)
Online/charts
- Reforestation, Nurseries, & Genetics Resources - Native Plant: Propagation and Restoration Strategies
- Wild Seed Project - “How to Grow From Seed - Detailed Guide”
Compiled by Mikaela Boley, Principal Agent Associate, University of Maryland Extension and Janet Mackey, Talbot County Master Gardener Volunteer. Reviewed by Miri Talabac, Coordinator & Certified Professional Horticulturist, and Christa Carignan, Coordinator & Certified Professional Horticulturist, UME-Home and Garden Information Center. October 2024
Still have a question? Contact us at Ask Extension.