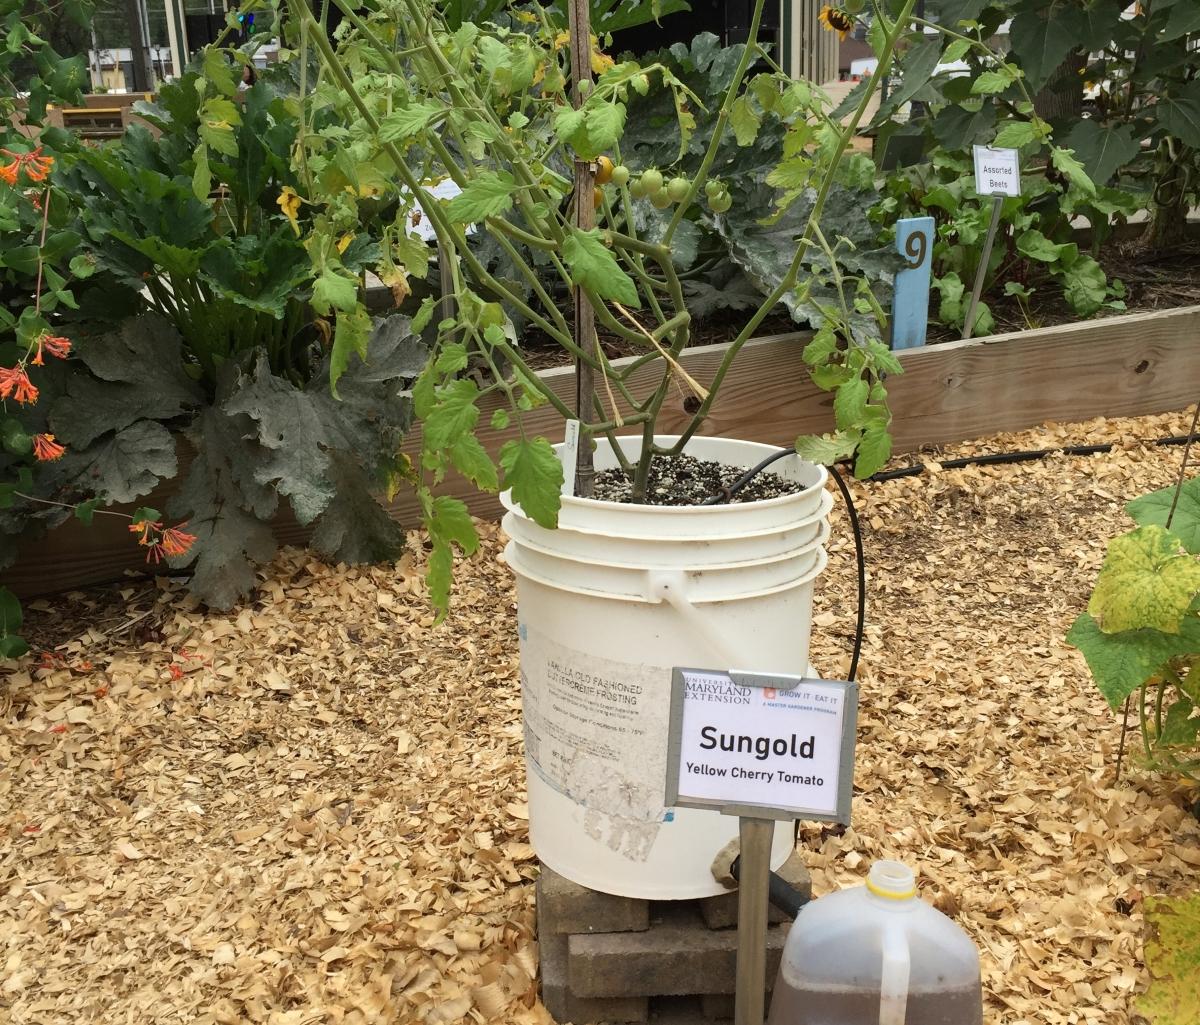
using a bucket container to grow a tomato plant

A tomato plant growing in a 5-gallon self-watering "bucket garden" at the Master Gardener Learning Garden, Maryland State Fairgrounds. Photo: J. Traunfeld, UME

Updated: March 4, 2024

“Self-watering” containers are an option for container gardening. Instead of drainage holes in the bottom, these containers have an overflow hole on one side. The growing medium sits on a perforated platform directly above a water reservoir. Plant roots grow through the medium and into the water. In most cases, water is wicked up from the reservoir into the medium. These containers can be seen as a hybrid between hydroponic gardening (plant roots growing in nutrient-enriched water) and conventional container gardening. Self-watering containers help conserve water and nutrients and make it possible to ignore your containers for a few days. A number of commercial models are available or you can make your own.

Converting a 5-gallon bucket into a mini-garden

The ubiquitous five-gallon plastic bucket is considered by some to be the most useful tool on earth, particularly in poor countries. Thousands are buried in landfills or burned each day in the U.S. Thrifty gardeners rescue them from local businesses and use them to harvest, store, and protect crops, carry water and tools, spread compost, and make compost tea. University of Maryland researchers have designed a new use: a mini-garden for vegetables and herbs that recycles water and nutrients and uses only compost as the growing medium.
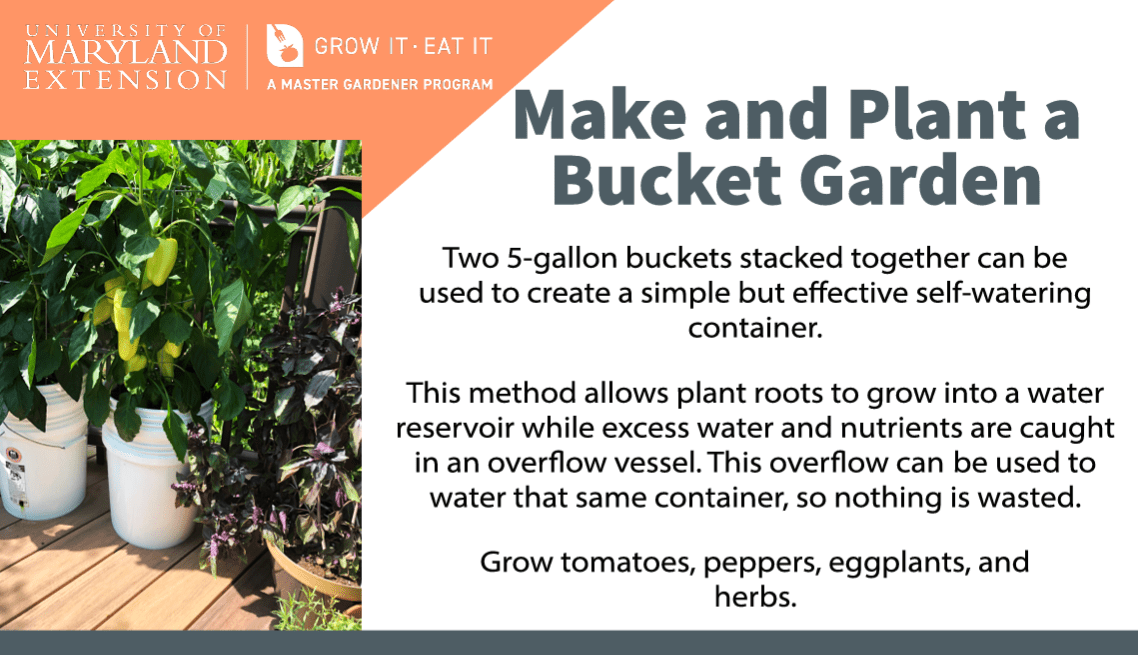
picture of a container vegetable garden and an overview of how to make and plant a bucket garden


Download How to Make a Bucket Garden

How to Make and Plant a Self-Watering Bucket Garden

Materials List & Construction Steps

 Materials list

  • 5- gallon plastic bucket and lid (food grade). Bakeries, delis, and restaurants will often give them away.
  • 7.5-inch section of 4-inch diameter perforated drain tile
  • 6-inch section of ½ inch (inside diameter) plastic tubing
  • 1 ½ inch wood or decking screw
  • electrical tape
  • empty 1-gallon milk jug

Tool list

Saber saw, drill, 5/16 inch and 3/4 inch drill bits, utility knife, hacksaw

Construction steps

1. Using a saber saw or band saw cut the lid so that it fits inside the bucket. (The lid will separate the medium from the water reservoir).

2. Drill 15 holes, 5/16” in diameter, in the lid. (Plant roots will grow through the medium and pass through these holes into the reservoir.)

1st step of self-watering container construction

3. With a hacksaw cut 3 pieces of 4-inch diameter black perforated drain tile 2 ½ inches long.   These are placed in the bottom of the bucket to support the lid-separator).

Third step pf self-watering container with black feet made of cut pipe at the bottom

4. Drill one ¾ inch hole with a drill bit 2 inches above the bottom of the 5-gallon bucket.

5. Cut a 6-inch piece of ½ inch (inside diameter) clear plastic tubing; wrap one end with electrical tape, to create a snug fit, and insert it into the hole. The tubing will sit directly below the separator.

    Fifth step of the self-watering container construction


    6.  Drive a screw through the tubing (inside the bucket), 1 inch from the end.

    7. Cut an “X” with a knife or razor into the shoulder of a 1-gallon milk jug. Insert the end of the tubing into the milk jug and raise the bucket 8 inches by setting it up on a cinder block or bricks.

    8. Decorate and beautify your bucket with decoupage or spray paint (Krylon Fusion™ for Painting Plastic)

    illustration of a completed self-watering container


    How to use the “self-watering” bucket garden

    Now that you’ve constructed your mini-garden it’s time to get growing! You’ll be impressed by how easy it is to recycle water and nutrients. Fill your bucket with about 4 gallons of a moistened medium, plant your seeds or plants, and add 2-3 gallons of water. The reservoir will fill with water and the excess will travel through the tubing into the milk jug. If it doesn’t rain, your bucket will need to be watered regularly— every day in July and August if it’s in the full sun each day. It will take 1-2 quarts of water each day to fill the reservoir. Before adding new water, simply pour back the water that collects in the milk jug. Using this technique no water or nutrients are wasted.

    cutaway illustration of how the self-watering container works


    Still have a question? Contact us at  Ask Extension.